Table of Contents
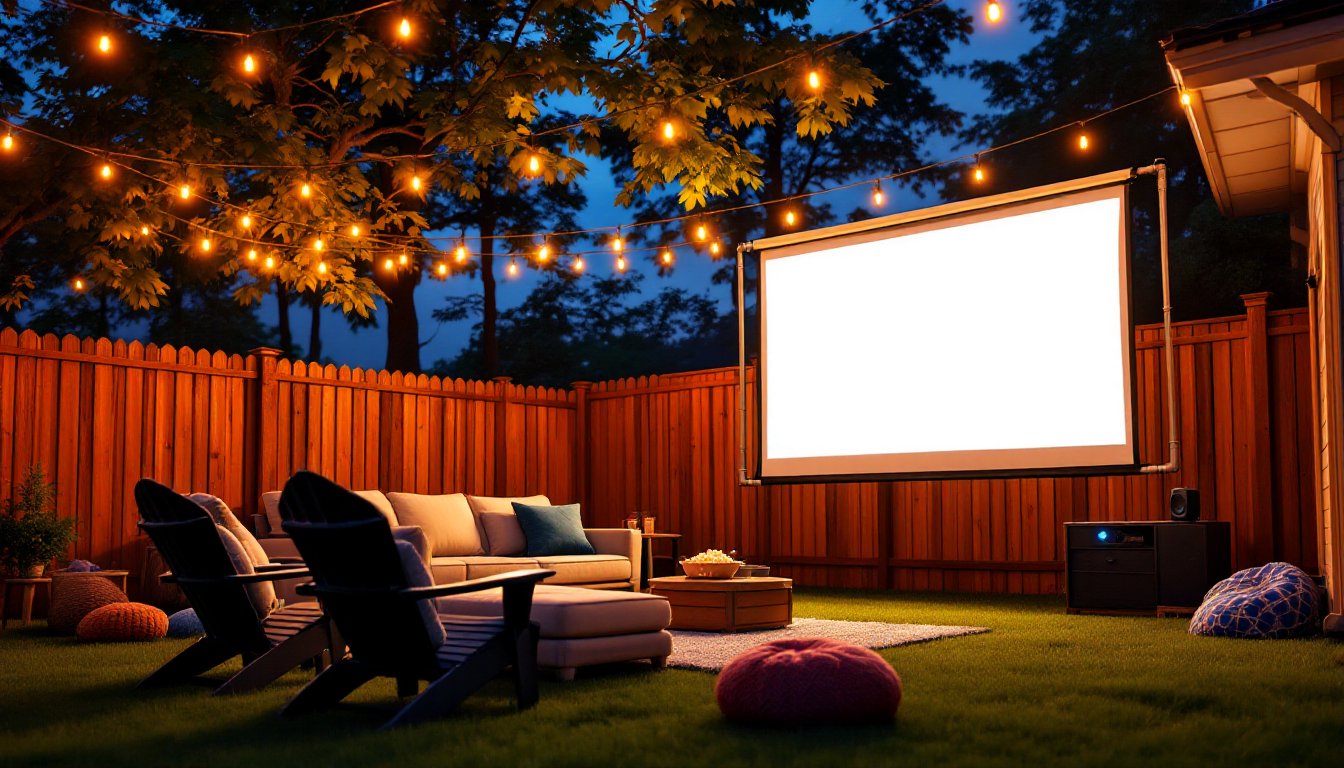
ToggleThere’s something magical about watching a movie under the stars, popcorn in hand, a blanket draped over your lap, and the glow of the screen flickering against the night. Setting up a backyard projector isn’t just for the tech-savvy or those with Hollywood budgets. With the right equipment and a bit of planning, any homeowner can create an outdoor cinema that rivals the multiplex experience. Whether it’s family movie nights, game-day screenings, or hosting friends for a summer film festival, a backyard projector setup adds serious entertainment value to your outdoor space.
Key Takeaways
- Choose a backyard projector with at least 3,000 lumens for dusk viewing or 4,000+ lumens for daylight use to ensure a bright, clear image in outdoor environments.
- Build a DIY outdoor screen using PVC pipe frames and white blackout cloth for under $100, or paint a dedicated wall with specialized screen paint for a semi-permanent solution.
- Invest in a dedicated audio system like outdoor soundbars or Bluetooth speakers instead of relying on the projector’s built-in speakers for superior dialogue clarity and immersive sound.
- Create comfortable backyard projector seating with tiered arrangements, outdoor sectionals, or Adirondack chairs positioned on slopes to ensure clear sightlines for all viewers.
- Use dimmable warm white string lights behind seating and weatherproof storage solutions to protect equipment from moisture while maintaining the perfect outdoor cinema ambiance.
- Secure screens and furniture with stakes or sandbags to prevent wind damage, and allow projectors to acclimate for 10–15 minutes before powering on in temperature-changing conditions.
Choosing the Right Projector for Your Backyard Setup
Not all projectors are built for outdoor use, and picking the wrong one means squinting at a washed-out image once the sun hasn’t fully set. For backyard setups, prioritize lumens, the measure of brightness. Indoor projectors typically run between 1,000 and 2,500 lumens, but outdoor environments demand more punch. Look for projectors with at least 3,000 lumens if you plan to start movies at dusk. For full daylight viewing or ambient backyard lighting, bump that to 4,000+ lumens.
Resolution matters, too. A 1080p (Full HD) projector is the sweet spot for most backyard setups, sharp enough for movies and sports without the cost of 4K. If you’re projecting on a screen larger than 120 inches or sitting closer than 10 feet, 4K becomes worth considering. Native resolution beats upscaled every time, so check specs carefully.
Throw distance is the space between the projector and the screen. Short-throw projectors work well in compact yards, delivering a large image from just a few feet away. Standard-throw models need 10 to 15 feet of clearance but are more affordable. Measure your space before buying, most manufacturers provide throw calculators online.
Portability is another factor. Battery-powered projectors (often rated for 2 to 3 hours of runtime) eliminate extension cord hassles, but they sacrifice brightness. Plug-in models deliver better performance if you have an outdoor outlet or don’t mind running a heavy-duty extension cord rated for outdoor use (look for 12-gauge wire for runs over 50 feet).
Weather resistance isn’t standard. Most projectors aren’t rated for moisture or dust, so plan to store yours indoors between uses unless you invest in a weatherproof enclosure. If you’re serious about a permanent setup, consider a projector with an IP rating (IP65 or higher), though these command a premium.
DIY Outdoor Screen Solutions That Actually Work
You don’t need a $500 commercial screen to get a crisp image. A taut, white surface is all that’s required, and several DIY backyard projects can deliver that for under $100.
PVC pipe frames are the most popular DIY option. Build a rectangular frame using 1-inch or 1.5-inch PVC pipe and corner fittings, then stretch a white blackout cloth or projector screen fabric (available in rolls) across the frame. Secure the fabric with grommets and bungee cords for tension. A 10-foot-wide screen frame typically costs $40 to $60 in materials and takes about an hour to assemble. Bonus: it breaks down for storage.
For a permanent installation, mount a wooden frame on a fence or exterior wall. Use 1×2 or 1×3 furring strips to create the border, then staple or tack the screen material tightly across the frame. Spandex fabric works surprisingly well, it’s affordable, wrinkle-resistant, and provides a smooth surface. Just avoid stretching it too thin, or you’ll see wrinkles when the projector’s on.
If you’re working with a tight budget, a plain white bed sheet can work in a pinch, but it won’t be as bright or color-accurate as purpose-made screen fabric. Iron it first and stretch it as flat as possible. Many DIYers paint a dedicated outdoor wall with screen paint (a specialized high-reflectivity coating), which creates a semi-permanent viewing surface and eliminates the need for fabric entirely. One gallon covers roughly 100 square feet and runs about $50 to $80.
For a more creative approach, some homeowners hang outdoor movie screens from sturdy tree branches using rope and grommeted tarps. Just make sure the screen isn’t flapping in the wind, even light movement ruins the viewing experience. Tutorials on sites like Instructables offer step-by-step guides for various frame designs and mounting techniques.
Creative Seating Arrangements for Ultimate Viewing Comfort
Folding chairs work, but they don’t exactly scream “cinematic escape.” For a proper backyard theater vibe, mix seating options to accommodate different preferences and group sizes.
Outdoor sectionals or modular sofas provide the most comfort, especially if you already own patio furniture. Arrange them in a semi-circle facing the screen, and add outdoor throw pillows and blankets for a cozy feel. If you’re investing in new seating, look for weather-resistant cushions with solution-dyed acrylic fabric, it resists fading and mildew better than cheaper polyester blends.
Adirondack chairs offer a laid-back option and are easy to reposition. Pair them with small side tables or ottomans so guests have a spot for drinks and snacks. For larger groups, consider backyard entertaining setups that incorporate built-in bench seating along a fence line or retaining wall. Top the benches with outdoor cushions for added comfort.
Bean bags and floor cushions are kid magnets and work great on grass or a patio. Look for outdoor-rated versions filled with polystyrene beads and covered in water-resistant fabric. They’re lightweight, stackable, and surprisingly durable.
For a more theatrical experience, build tiered seating using landscape timbers or concrete blocks to create platforms at different heights. Cover the platforms with outdoor rugs or astroturf, then add cushions or low chairs. This approach ensures everyone has a clear sightline, even in a flat yard.
If your yard slopes naturally, use it to your advantage. Position seating on the incline so viewers look slightly downward at the screen, it’s easier on the neck than craning upward. Just make sure chairs are stable on uneven ground: staked chair legs or sandbags can prevent tipping.
Sound System Essentials for Outdoor Movie Nights
The built-in speaker on most projectors won’t cut it outdoors, sound dissipates quickly in open air, and you’ll lose dialogue and low-end punch. A dedicated audio setup is non-negotiable for a true theater experience.
Bluetooth speakers are the easiest solution for casual setups. Pair a projector or streaming device with a portable speaker (look for models with at least 20 watts of output and a runtime of 8+ hours). For better stereo separation, use two speakers placed on either side of the screen. Brands like JBL, Bose, and Anker offer rugged, weather-resistant options that sound solid without very costly. Advice from Popular Mechanics on outdoor audio systems often highlights the importance of pairing speakers with the right wattage for open spaces.
Soundbars designed for outdoor use deliver clearer dialogue and more immersive sound than standalone Bluetooth speakers. Mount a soundbar below the screen or place it on a table at the front of the seating area. Many soundbars include a wireless subwoofer, which adds the bass that makes action scenes and musical scores feel full. Just be mindful of neighbors, bass travels.
For permanent or semi-permanent installations, consider wired outdoor speakers connected to a home theater receiver or amplifier. Bury speaker wire in shallow trenches (6 inches deep is plenty) or run it along fences using wire clips. Choose speakers rated for outdoor use, they’re built to handle moisture and temperature swings. Position them at ear level or slightly above, angled toward the seating area.
Wireless audio transmitters (like Bluetooth 5.0 adapters) solve the problem of running cables across the yard. Plug the transmitter into your projector’s audio output, then connect wireless speakers or headphones. Latency can be an issue with cheaper transmitters, causing audio to lag behind the video, so look for low-latency codecs like aptX.
Finally, don’t ignore power needs. Outdoor speakers and soundbars require electricity, so plan for extension cords or invest in a weatherproof outdoor outlet box installed by a licensed electrician. If you’re powering multiple devices (projector, speakers, lights), use a GFCI-protected outdoor power strip to avoid overloading a single outlet.
Lighting and Ambiance Tips to Set the Perfect Mood
Lighting is tricky with outdoor projectors, too much and the image washes out, too little and guests trip over chairs in the dark. The goal is subtle ambiance that keeps the space functional without competing with the screen.
String lights are the go-to for backyard theaters. Hang them behind the seating area or along the perimeter of the yard, away from the direct sightline to the screen. Warm white LEDs (2700K to 3000K color temperature) create a soft glow without the harshness of daylight bulbs. Dimmable string lights are even better, you can adjust brightness as the movie starts.
Solar-powered path lights or stake lights are practical for marking walkways and preventing ankle-twisters. Place them along the edges of patios, decks, or grassy areas where people will walk. They charge during the day and turn on automatically at dusk, so there’s no wiring or switches to fuss with. For outdoor entertaining spaces, layered lighting adds both safety and style.
Lanterns and flameless candles on side tables add a cozy touch without the fire risk of real flames. Battery-operated LED candles flicker realistically and won’t blow out in the wind. If you want the real deal, use citronella candles or torches to double as bug repellent, mosquitoes are the uninvited guests nobody wants.
Avoid placing lights directly in front of the screen or anywhere that creates glare. Uplighting trees or architectural features in the background can add depth to the space without interfering with the projection. Use low-wattage landscape spotlights on a separate switch so you can turn them off once the movie starts.
If you’re showing movies during twilight (before full dark), consider a light-blocking backdrop behind the screen. Hang dark fabric, a tarp, or even a painted panel to reduce ambient light reflection. This trick improves contrast and makes the image pop, especially with lower-lumen projectors. Inspiration for creative outdoor lighting setups can be found on sites like Gardenista, which specializes in landscape and outdoor living design.
Weather Protection and Seasonal Considerations
Outdoor projectors and electronics don’t mix well with rain, humidity, or freezing temps, so planning for weather is essential, even if you live in a dry climate.
Most projectors aren’t waterproof. If there’s any chance of rain, bring the unit indoors or store it in a weatherproof storage box between uses. For semi-permanent setups, build a simple projector shelter using a plywood box with ventilation holes and a hinged lid. Line the interior with foam to prevent rattling and add a desiccant pack to absorb moisture.
Screens made from blackout cloth or spandex are more forgiving than rigid screens, they dry faster and won’t warp. If you’re using a DIY PVC frame, disassemble it and store the fabric flat or rolled to prevent mildew. Permanent painted screens on walls or fences can handle light moisture but will degrade over time in harsh climates. Repaint every few years to maintain brightness.
Temperature swings affect electronics. Projectors contain lamps or LED arrays that don’t like condensation. If you’re setting up on a cool evening after a hot day, let the projector acclimate to outdoor temps for 10 to 15 minutes before powering on. Rapid temperature changes can cause internal fogging or shorten bulb life.
Wind is another enemy. Secure lightweight screens with sandbags, stakes, or guy lines to prevent flapping. If your setup includes tablecloths, snack stations, or lightweight furniture, weigh them down or anchor them. A gust mid-movie is distracting at best and a safety hazard at worst.
For year-round use in mild climates, consider adding patio heaters or fire pits to extend the season into fall and early spring. Propane or natural gas heaters are efficient, but keep them at least 10 feet from screens, fabrics, and seating. If you’re planning outdoor gatherings in cooler months, have blankets on hand, guests are more likely to stay for a double feature if they’re warm.
Bug control isn’t weather-related, but it’s seasonal. Citronella candles, bug zappers, or oscillating fans (mosquitoes are weak fliers) can keep pests at bay. For serious mosquito pressure, treat the yard with a perimeter spray a few hours before showtime. Always follow label instructions and keep pets indoors until it’s dry.
Conclusion
Building a backyard movie setup doesn’t require a contractor or a small fortune, just a solid plan, the right equipment, and attention to the details that make the experience comfortable and memorable. Start with a quality projector matched to your space, craft or buy a screen that fits your budget, and don’t skimp on sound or lighting. With the right setup, your backyard becomes the go-to spot for movie nights, game days, and gatherings that guests won’t forget.