Table of Contents
ToggleBackyards aren’t just grass and patio furniture anymore. Homeowners are building actual structures, covered spaces, functional rooms, and year-round retreats that extend the home’s footprint and add serious value. Whether it’s a dining pavilion that seats twelve or a potting shed that finally gets tools off the deck, the right structure makes outdoor space work harder. This guide covers six categories of backyard structures, with real-world dimensions, material considerations, and honest assessments of cost and complexity. No Pinterest fluff, just practical ideas homeowners can actually build or hire out.
Key Takeaways
- Backyard structure ideas range from simple pergolas and arbors to complex outdoor kitchens and gazebos, each requiring different skill levels, permits, and budgets ranging from $1,500 to $25,000+.
- Pergolas and arbors are the most DIY-friendly backyard structures, requiring no permits in most areas and can be completed in a weekend with basic materials like cedar or pressure-treated pine.
- Gazebos and outdoor kitchens demand proper foundations (concrete slabs or sonotubes), electrical wiring from licensed professionals, and building permits for structures exceeding 120–200 square feet depending on local codes.
- Sheds and studios should meet code requirements for insulation (R-13 walls, R-30 to R-38 ceiling), egress windows, and electrical subpanels, with foundation choice depending on size and whether the space will be heated or cooled.
- Fire pit shelters and greenhouses require noncombustible materials within safety zones, proper ventilation for temperature control, and drainage planning to prevent water pooling and structural damage.
- Always verify local setback requirements, obtain necessary building permits, and hire licensed professionals for structural, electrical, plumbing, and gas work to ensure safety and compliance.
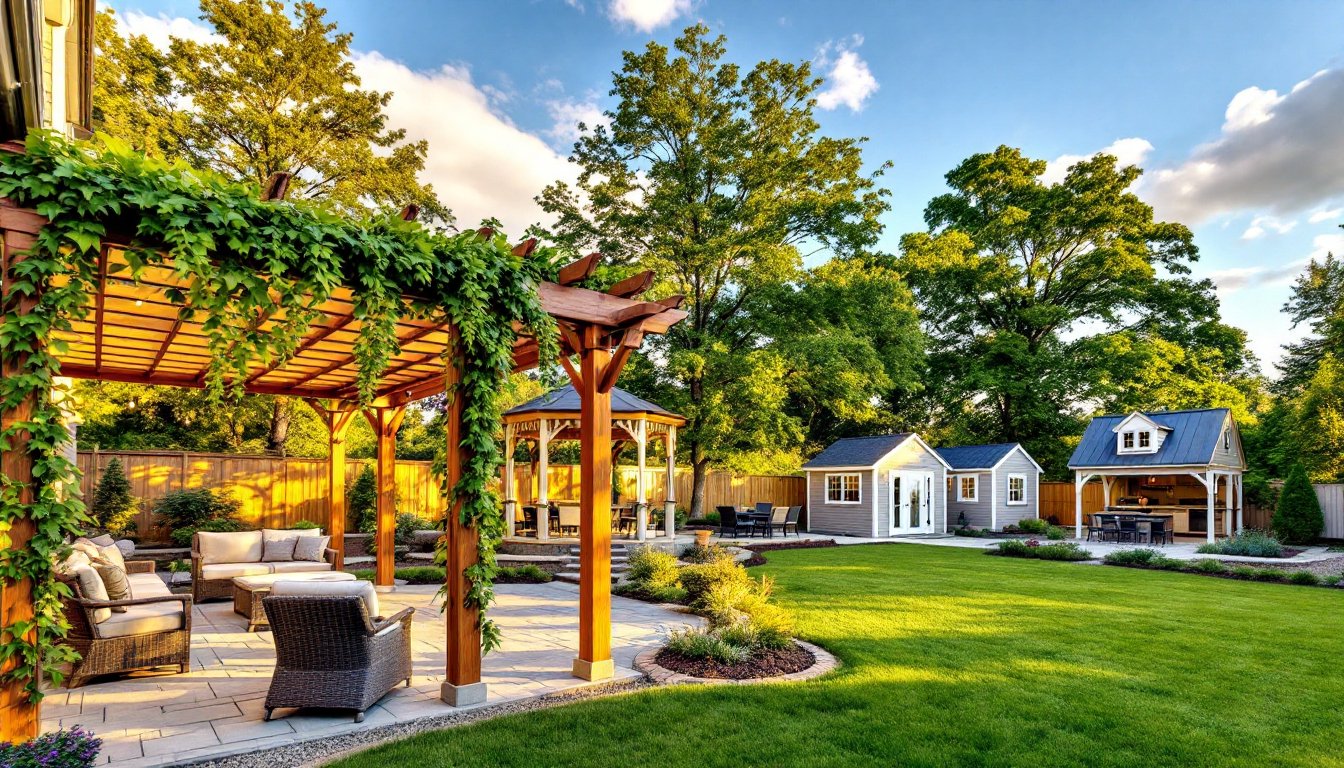
Pergolas and Arbors for Shade and Style
Pergolas and arbors are the gateway drug to backyard structures. They’re relatively simple to build, don’t usually require a permit (check local codes for setback and height restrictions), and deliver immediate visual impact.
A pergola is a freestanding or attached overhead structure with open rafters, typically 4×4 or 6×6 posts supporting 2×6 or 2×8 beams and 2×4 rafters spaced 12 to 24 inches apart. Standard sizes run 10×10 feet to 12×20 feet, but custom dimensions are common. Cedar and pressure-treated pine are the default choices: Western red cedar weathers to a silver-gray and resists rot naturally, while PT pine costs about 30–40% less but needs sealing every few years. For a modern look, aluminum or vinyl pergola kits are low-maintenance but lack the warmth of wood.
An arbor is essentially a miniature pergola, usually 3 to 4 feet wide and 6 to 8 feet tall, designed to frame a walkway or garden entry. It’s a weekend project for confident DIYers: dig post holes 24 inches deep (below frost line in cold climates), set posts in fast-set concrete, and attach the crossbeams with galvanized lag screws or structural brackets.
Both structures benefit from outdoor entertaining features like string lights, retractable shade cloth, or climbing vines (wisteria, clematis, or grape for edible coverage). A well-designed outdoor structure can anchor a seating area or define zones in a larger yard. If attaching a pergola to the house, use a ledger board bolted through the siding into the rim joist, this is structural work, so follow IRC span tables for beam sizing based on your roof load and post spacing.
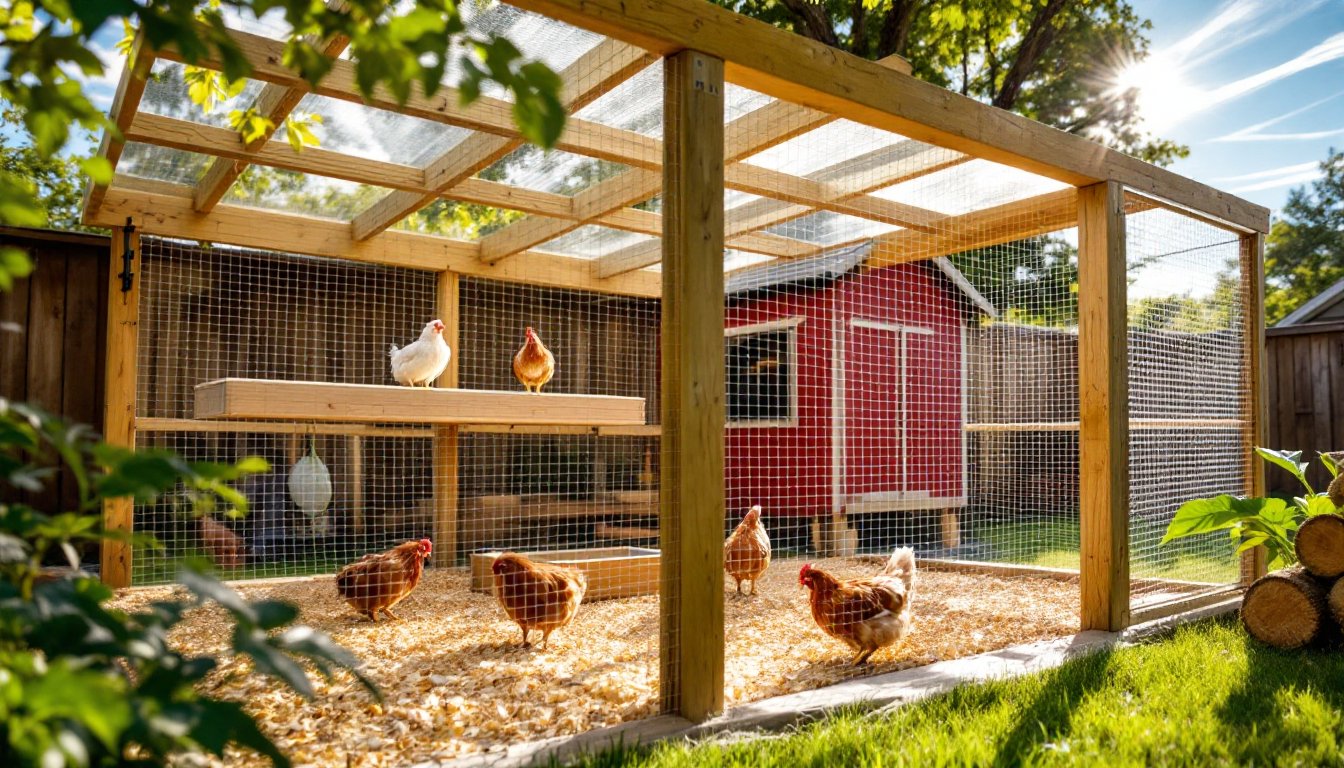
Gazebos: Classic Sheltered Retreats
Gazebos bring a fully covered roof, making them more complex, and more functional, than pergolas. Most are octagonal or rectangular, ranging from 8×8 feet (cozy) to 14×16 feet (party-ready). Expect to use 4×4 or 6×6 posts, 2×6 rafters, and either asphalt shingles or metal roofing to match the main house.
Kit gazebos from big-box stores start around $1,500 for basic models, but you’re looking at $3,000–$8,000 for solid wood construction with good hardware. A built-from-scratch gazebo requires intermediate carpentry skills: laying out an octagon accurately, cutting compound angles for roof rafters, and ensuring the roof pitch (usually 6/12 or steeper) sheds water properly.
Foundations matter. A gravel base with paver blocks works for small gazebos on level ground, but anything over 10×10 feet benefits from a poured concrete slab (4 inches thick, with 6×6 wire mesh) or sonotube footings for each post. Many municipalities classify gazebos as accessory structures, which may trigger setback requirements, typically 5 to 10 feet from property lines, and require a building permit if the structure exceeds 120 to 200 square feet (varies by jurisdiction).
Gazebos shine as backyard entertaining spaces when wired for lighting and ceiling fans. Running electricity requires UF-B (underground feeder) cable buried 18 to 24 inches deep in conduit, terminating at a GFCI-protected outlet or junction box. Unless you’re comfortable with the NEC, hire an electrician for this part.
Outdoor Kitchens and Dining Pavilions
An outdoor kitchen pavilion is a step up in complexity and budget, think $8,000 to $25,000+ depending on appliances, countertops, and roof size. The structure typically features a gable or hip roof over a cooking and dining zone, with 6×6 posts anchored to a concrete slab foundation (minimum 4 inches thick, reinforced with rebar on 18-inch centers).
Key components include a built-in grill island with cement board sheathing over a 2×4 or steel-stud frame, topped with tile, granite, or concrete countertops. Most codes require a Type I hood (with fire suppression) for built-in grills if the structure is enclosed: open-air setups usually get a pass but confirm with your building department. Gas lines must be run by a licensed plumber using black iron pipe or approved flexible connectors, and all connections need leak testing.
Electrical and plumbing rough-ins should happen before pouring the slab. Plan for 20-amp GFCI circuits (outdoor kitchens typically need two), a dedicated circuit for a refrigerator, and a cold water supply line (3/4-inch PEX is common) if adding a sink. A P-trap and drain line sloped at 1/4 inch per foot keeps wastewater flowing to a dry well or sewer tie-in.
Roofing over the kitchen protects cabinetry and keeps rain off the grill. Use the same materials as the main house for visual continuity, architectural shingles or standing-seam metal. Incorporate a drip edge and gutters to direct runoff away from the slab. Many outdoor entertaining setups combine cooking zones with lounge seating under a shared roof, maximizing usable square footage.
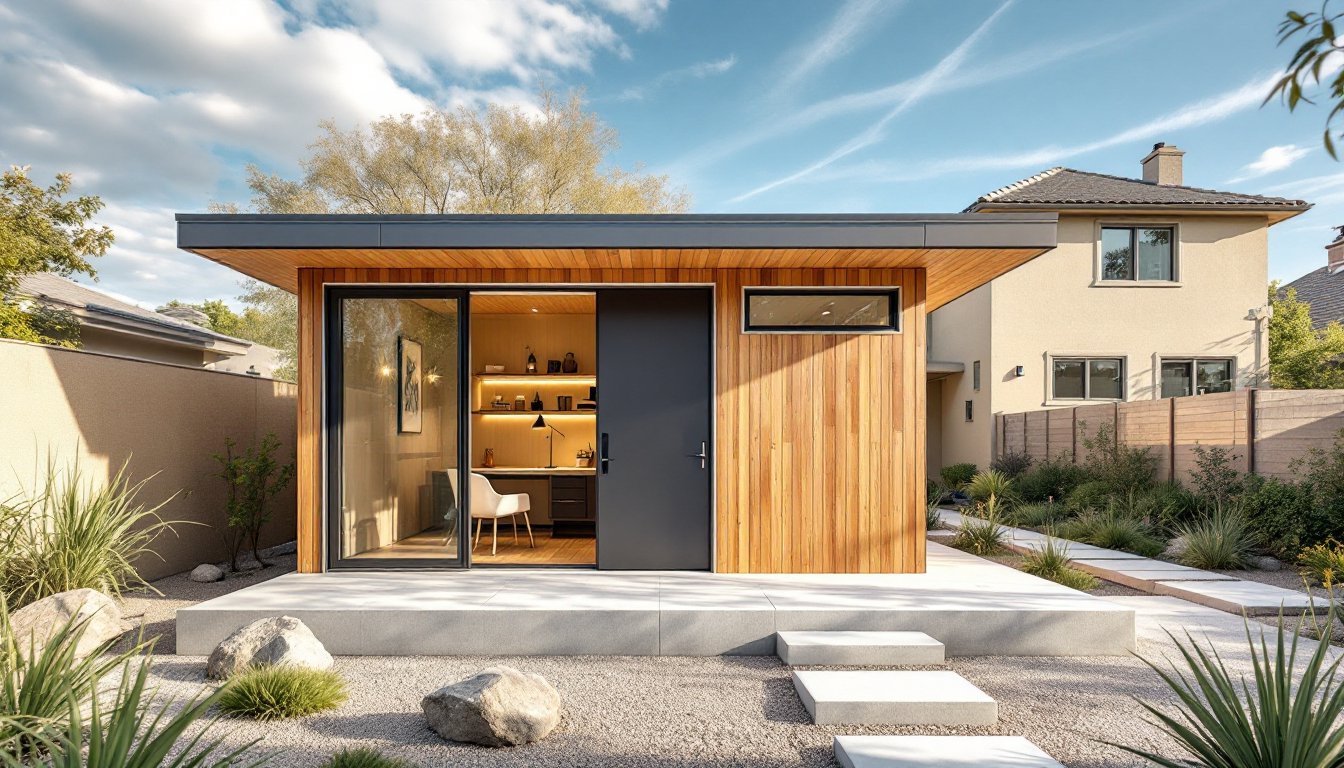
Sheds, Studios, and Functional Outbuildings
Sheds and studios do the heavy lifting for storage, hobbies, or remote work. A basic 8×10-foot storage shed can be built in a weekend on a gravel base with 4×4 treated skids. For anything larger or used as conditioned space (heated/cooled), pour a slab or use a pier-and-beam foundation with concrete footings below frost line.
Standard shed construction uses 2×4 wall framing on 16-inch centers, 2×6 or engineered roof trusses, and 7/16-inch OSB sheathing. Roof pitch should be at least 4/12 for proper drainage: a gable or shed roof is simplest for DIY builders. Cover with 30-pound felt paper and asphalt shingles, or go with a metal roof for longevity (40+ years vs. 20 for shingles).
For a backyard studio or office, insulation and finishes matter. Use R-13 batts in walls and R-30 to R-38 in the ceiling (depending on climate zone). Add a vapor barrier on the warm side (interior in cold climates), then finish with 1/2-inch drywall or tongue-and-groove pine for a cabin feel. Install at least one egress window (minimum 5.7 square feet of openable area) if someone will sleep there, it’s a life-safety code issue.
Electrical service typically runs from the main panel via UF-B cable in conduit. A 100-amp subpanel is overkill for a shed: a 60-amp or even 30-amp subpanel handles lights, outlets, and a mini-split HVAC unit. Gas or wood stoves require combustion air and proper venting, consult local codes or hire a pro. Many jurisdictions classify studios over 120 square feet as habitable structures, triggering full permit and inspection cycles. For budget-conscious builders, a smaller footprint keeps costs and red tape manageable.
Fire Pit Shelters and Lounge Areas
A fire pit shelter combines the warmth of an open flame with overhead weather protection, think of it as a gazebo built around a fireplace or fire pit. Common designs include three-sided pavilions with a stone or brick fireplace on the back wall, or open-roof pergolas with a central fire feature and surrounding seating.
If building a masonry fireplace, you’ll need a concrete footing at least 12 inches thick extending below frost line, plus a reinforced concrete hearth pad. The firebox requires firebrick rated to 2,000°F, set with refractory mortar. The chimney must extend at least 2 feet above any roof surface within 10 feet (per IRC): this often means a tall chase if the shelter has a peaked roof.
For a simpler setup, a freestanding steel or cast-iron fire pit on a paver or gravel pad needs only a basic overhead structure. Keep the roof minimum 10 feet overhead to avoid heat damage and smoke staining, and use noncombustible decking or stone within a 10-foot radius of the fire. Garden design resources often showcase creative fire pit layouts with built-in stone seating or retaining walls that double as benches.
Electrical for lighting and music is a nice touch, run low-voltage landscape lighting (12V) for path lights and overhead string lights, or use 120V weatherproof fixtures on GFCI circuits for brighter task lighting. Gas fire pits require a black iron gas line and manual or electronic ignition: many pros recommend a flame-sensing safety valve that shuts off gas if the flame goes out.
Greenhouses and Garden Structures
Greenhouses range from $500 hoop houses covered in 6-mil polyethylene film to $10,000+ glass or polycarbonate structures with automated vents and irrigation. For a DIY greenhouse, a 8×12-foot footprint on a treated 4×4 base with 2×4 framing and twin-wall polycarbonate panels is a sweet spot, enough room for seed starting and season extension without very costly.
Foundation options include gravel over landscape fabric, paver blocks, or a shallow concrete footing. Greenhouses need excellent drainage: avoid placing them in low spots where water pools. Roof pitch should be at least 4/12 (ideally 6/12 or steeper) to shed snow and maximize winter sun angles.
Ventilation is critical. Plan for roof vents (manual or automatic openers that react to temperature) and sidewall louvers or roll-up sides for cross-ventilation. In summer, even a small greenhouse can hit 120°F+ without airflow. Shade cloth (30–50% density) can be draped or clipped to rafters during peak heat.
For year-round use, insulated north walls (using rigid foam insulation) and a small electric or propane heater extend the growing season. Electrical needs are modest, one 15-amp GFCI circuit covers lights, a fan, and a heat mat for seedlings. Water access is a luxury: run a 3/4-inch PEX line from the house, insulated and buried below frost line, terminating at a frost-free hose bib inside the greenhouse. Home improvement sites regularly feature greenhouse plans with material lists and cut diagrams.
Conclusion
Backyard structures shift outdoor space from decorative to functional. Whether it’s a simple arbor framing a garden path or a full dining pavilion with a built-in grill, the key is matching the structure to how the space will actually be used, and being realistic about skill level, budget, and local codes. Start with a solid foundation, use appropriate materials for the climate, and don’t skip permits for anything structural or electrical. Done right, these projects add usable square footage and real property value.